Pages

St Patricks Day Food and Party Ideas

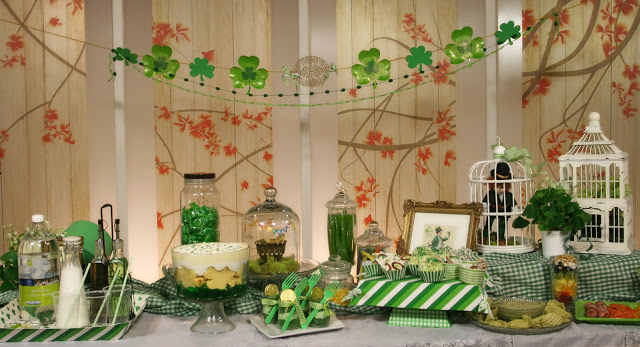
Are you here looking for St Patricks Day 

Food and Party Ideas?


Thanks for Visiting!
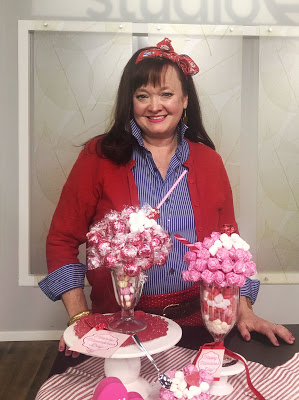
Sweet Shoppe Candy Bouquets

Candy Bouquets for Decor and Gifting

I was asked to create some Valentines Candy Bouquets for Studio 5!

I did 2 basic versions: A "Soda Shoppe Bouquet/Centerpiece"
and also some "Candy as Flowers" Bouquets


I didn't show all the ideas during the segment (7 minutes goes by SO fast!)
so I've added photos in this post to show more details.

The "Soda Shoppe Bouquets/Centerpieces" are quite easy, 
and I explain how to assemble them during the segment 
including various techniques and materials.


Here are the other variations that I came up with, some of which are not shown in the display I used for the segment, but I'm including them here!


For this Sucker Bouquet, I did a quick explanation of how to do the Ballerina Wrap on the handle, AND the surprise material I used for the handle and the leaves, during the segment. 
The Roses themselves are just taken apart and re-assembled using the sucker stick instead of the wire.
I then inserted each one into the foam base.
(Link to watch video below for the wrap)


The "Candy Rose Bouquets" are really fast and easy to make, and if you use flowers from the Dollar Store, very economical as well because you are not using much candy. You can make 4 or 5 of these 
for less than $10 total!
The center of each flower has a candy inside....for the large rose, it's a Dove Chocolate,
for the little one, it's a bundle of Jelly Beans wrapped with plastic.
For each one, I used a Sticky 3-D dot to attach the candy inside the center.


This "Single Rose" Bouquet has a skewer as the base, which has 3 foil wrapped hearts attached with sticky dots, and is then wrapped with Valentines Tinsel to hide the skewer. I cut the quick freehand leaves from tissue paper, and then nestled it all inside a piece of colored cellophane 
before wrapping with a ribbon.


This bouquet was made with those little strawberry candies. They look like roses to me when they are turned upside down with their green stems. I attached these to pipe cleaners in bundles of 3, surrounded by paper muffin liner and then added more liner poofs before securing all of them to a paper doily base to make a "Mussy Tussy" style bouquet.


This "Sucker Flower" is fast to use and you can make a lot of these for fast and
economically as well. These would be great to give to teachers or neighbors.
I started with the round base on a stick from the Birthday section at Dollar Tree. 
I glued on a spread out muffin liner, added some flower shapes cut with a Die Cut machine,
and poked a hole through all the layers. 
Then I used a small piece of pipe cleaner to attach three Sixlets candies together 
to form the "stamen" center. The pipe cleaner folds over onto the back, 
and then I added a freehand cut leaf to the stem.


I also designed some gift tags to go with the bouquets and you can download those free 
on my Blog Google Docs account. 
Just follow the link below the 2 files and look for the files listed.
Sweets Bouquet Tags

Valentine Sundae Tags


If you have any questions about how to assemble any of these bouquets,
please don't hesitate to ask me!


You can watch the segment here:


Thanksgiving Food Staging and Centerpieces

ARE YOU READY FOR THANKSGIVING??


Last year my husband and I celebrated big time because we knew it was our last Thanksgiving with just us and our kids. We are a blended family, so we only get the opportunity to have Thanksgiving with our kids every other year when they're not at their other parent's homes.

I hope you enjoy my pics and ideas for how to stage your food tables! 


As always, should you have questions or want to comment, please feel free to do so!


Before dinner, everyone enjoyed the Cracker and Cheese Buffet. This gave me time to finish up the main meal for about an hour! Throughout the tables, I used numerous Wood Slices and stumps for raising items up. It gave it a lot of texture, dimension and interest to the displays and serving areas.


After dinner, I cleared away the Appetizers and brought out the Desserts! I kept the decor the same, but just added the dessert items.


So here's the eating table. I went with an Aqua and Brown color scheme and used some of my vintage dishes and serving pieces, along with the wood stumps under the bowls and platters. A big display at the end of the table created a festive feel, and I was able to use my rattan chargers that I found at a thrift store the week prior for $1.00 each! Score!


One of the things I wanted to was document the event in pictures that I had everyone draw using the cute wood colored pencils that I found at World Market. So I gave everyone a piece of cardstock and just told them I wanted their version of a Thanksgiving Turkey. Oh man, did we get some funny pics! I have them saved for future years to display. My husband's was the funniest...he's rather irreverent! 


For place cards, I saved some oak leaves that blew into my yard a few weeks prior, pressed them in a book and then added everyone's names with a metallic aqua paint pen. I love them.


And just for one last fun decorative photo, here's what I did to my newly-installed Chandelier!


Vintage Pink Christmas Display

Okay I have to admit, I really love, LOVE pastels at Christmas. 

What's not to love though, right?


Let's suffice it to say that I have a FEW (hahaha...biggest understatement E-VER) collections. And I really have an obsession with Vintage Christmas Items.....Postcards, baubles, porcelain trees and figurines, etc. All came together in lovely fashion for this display. So without further ado...I'll let the pics speak for themselves.

But, should you happen to have questions about anything in the display, or just want to leave a comment (which are ALWAYS welcomed and appreciated), please do so!


data-pin-hover='true'